
// Article - How to load test REST API File Uploads in Rungutan
Written April 16, 2021
Intro
In some performance testing use cases it is not enough to just check how long it takes for a server to render a page, produce a set of search results or create an entity. For certain application types – let’s take enterprise content management systems as an example – the performance of file upload and download requests is vital and must be tested. In this article we'll describe how File Upload scenarios can be implemented using Rungutan, as well as how to understand the results!
What is Multipart or Multipart/form-data?
The enctype attribute specifies how the form-data should be encoded when submitting it to the server. Multipart/form-data is one of the most used enctype/content type.
In multipart, each of the field to be sent has its content type, file name and data separated by boundary from other field.
No encoding of the data is necessary, because of the unique boundary. The binary data is sent as it is. The server reads the until the next boundary string.
Using FormData Objects
The FormData object lets you compile a set of key/value pairs to send using XMLHttpRequest. It is primarily intended for use in sending form data, but can be used independently from forms in order to transmit keyed data. The transmitted data is in the same format that the form's submit() method would use to send the data if the form's encoding type were set to multipart/form-data.
source = MDN Web Docs
How does Rungutan tackle this?
All you have to do is simply upload the file and then reference it inside your workflow as following, and we take care of everything else for you!
[...]
    {
        "path": "/upload/file",
        "method": "POST",
        "files": [
            "file_name_to_upload"
        ],
        "data": "",
        "headers": {},
        "extract": []
    }
[...]
As you can see, all you have to do is just inject the file name, and that's it!
The maximum size of a file that we support is 10 MB.
Feature documentation
You'll be able to find of course more technical details and different methods of using this feature on our Documentation site at the File System page.
The documentation covers everything, such as:
- What roles have access to perform what actions
- How to list/download/upload/remove files from the WEB platform, using API calls or the CLI
How do I upload files?
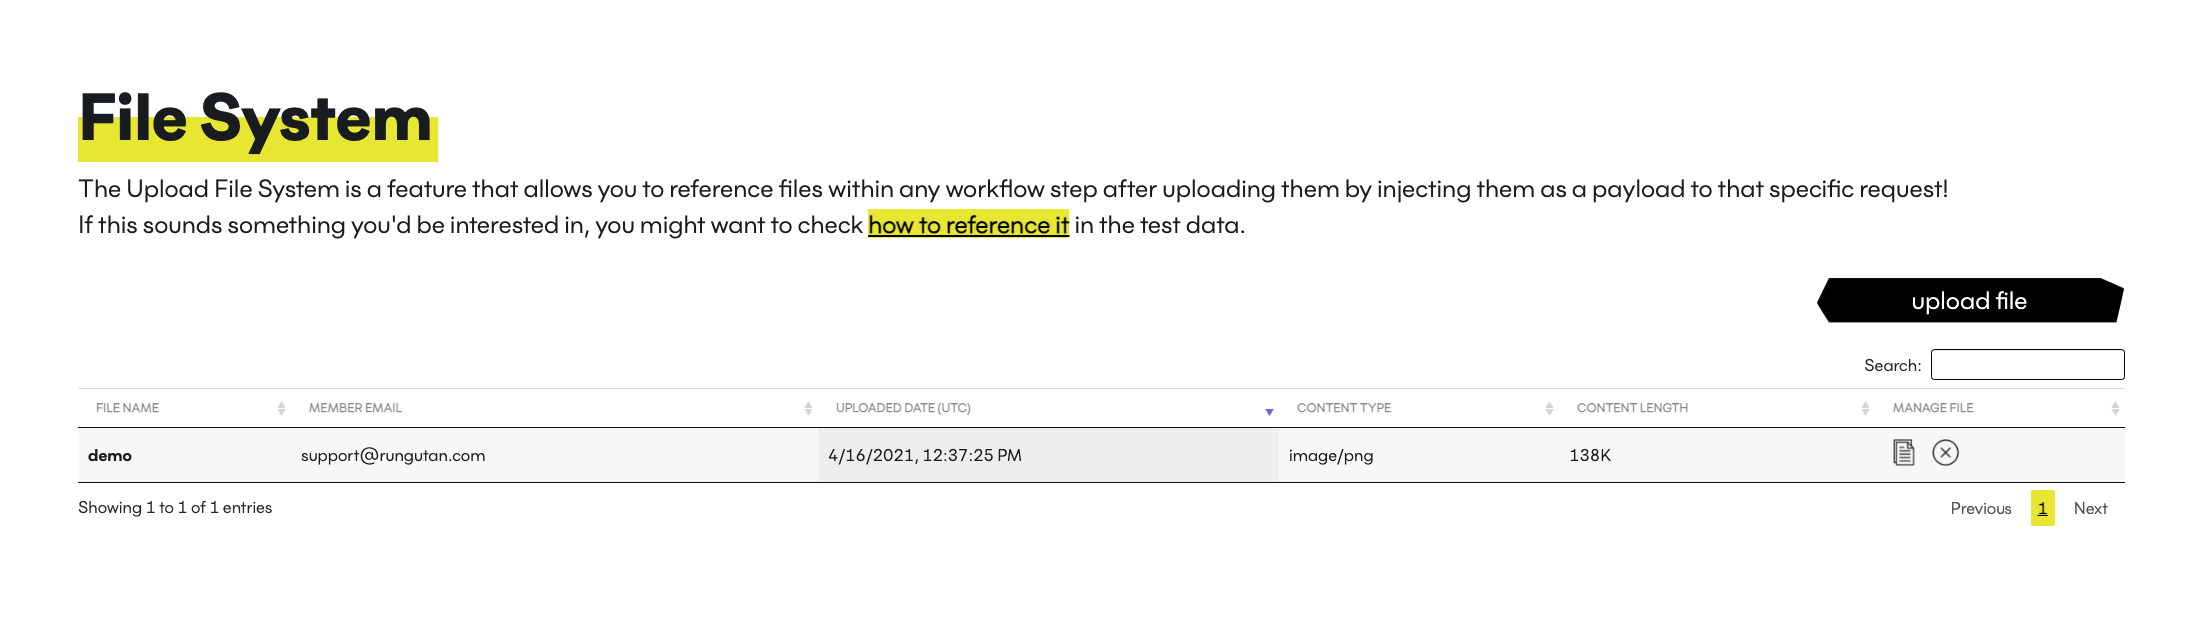
In order to upload a new file, all you have to do is browse to the File System page and click on the upload file button.
Once you do that, you're presented with 2 options:
- A name = this will be the name you will use to reference the file in your workflow
- A path = the local file in your desktop that will be uploaded in our encrypted storage system
Once that is done, then the File System page will be populated with your file and some metadata will show up according to your file's specifications, such as:
- File name
- Content Type
- File Size
We allow you to upload virtually any file type as long as it is smaller than 10MB!
How do I import files?
As you probably already realized, there is nothing to import.
As soon as the file has been uploaded, it is immediately and readily available to be used in your test data.
Sample scenario
As we said, you can use files to test your upload and processing mechanism of your REST API platform by performing that operation as many times as you need to through a standard load test scenario.
The usual scenario for such use case is that you have some sort of file storage and processing mechanism that needs to not only store but actually understand and compile the content of the files that it receives.
Here's how that would look like:
{
  "test_name": "Upload file to site with basic auth",
  "num_clients": 10,
  "run_time": 60,
  "threads_per_region": 1,
  "test_region": [ "us-east-1" ],
  "workflow": [
    {
      "path": "https://example.com/upload/file/system",
      "method": "POST",
      "files": [
         "file1", "file2"
      ]
      "headers": {
         "X-Api-Key": "${vault.api_key_authorization}"
      }
    },
    {
      "path": "https://example.com/blog/existing/post",
      "method": "POST",
      "files": [
         "file3"
      ]
      "headers": {
         "X-Api-Key": "${vault.api_key_authorization}"
      }
    },
  ]
}
TL;DR -> The test above references the files file1 and file2 in the 1st workflow step, and afterwards proceeds to publish another file with name file3 in the 2nd workflow step, all while authenticating with an API key stored in the Vault storage mechanism.
Here's the step by step long explanation:
- First workflow step:
- Hit the URL /upload/file/system with the METHOD POST
- Authenticate the API request using a VAULT key with the name api_key_authorization by placing it in the header key called "X-Api-Key"
- Include 2 files in the request, with the names file1 and file2 which were uploaded in our platform beforehand
- Second workflow step:
- Hit the URL /blog/existing/post with the METHOD POST
- Authenticate the API request using a VAULT key with the name api_key_authorization by placing it in the header key called "X-Api-Key"
- Include 1 different file in the request, with the name file3 which was uploaded in our platform beforehand
Final thoughts
Now you can easily and directly stress the REST API storage and processing mechanism of your platform through a simple and easy-to-use Rungutan Load Test Scenario which accurately shows not only API response times but their content length as well!